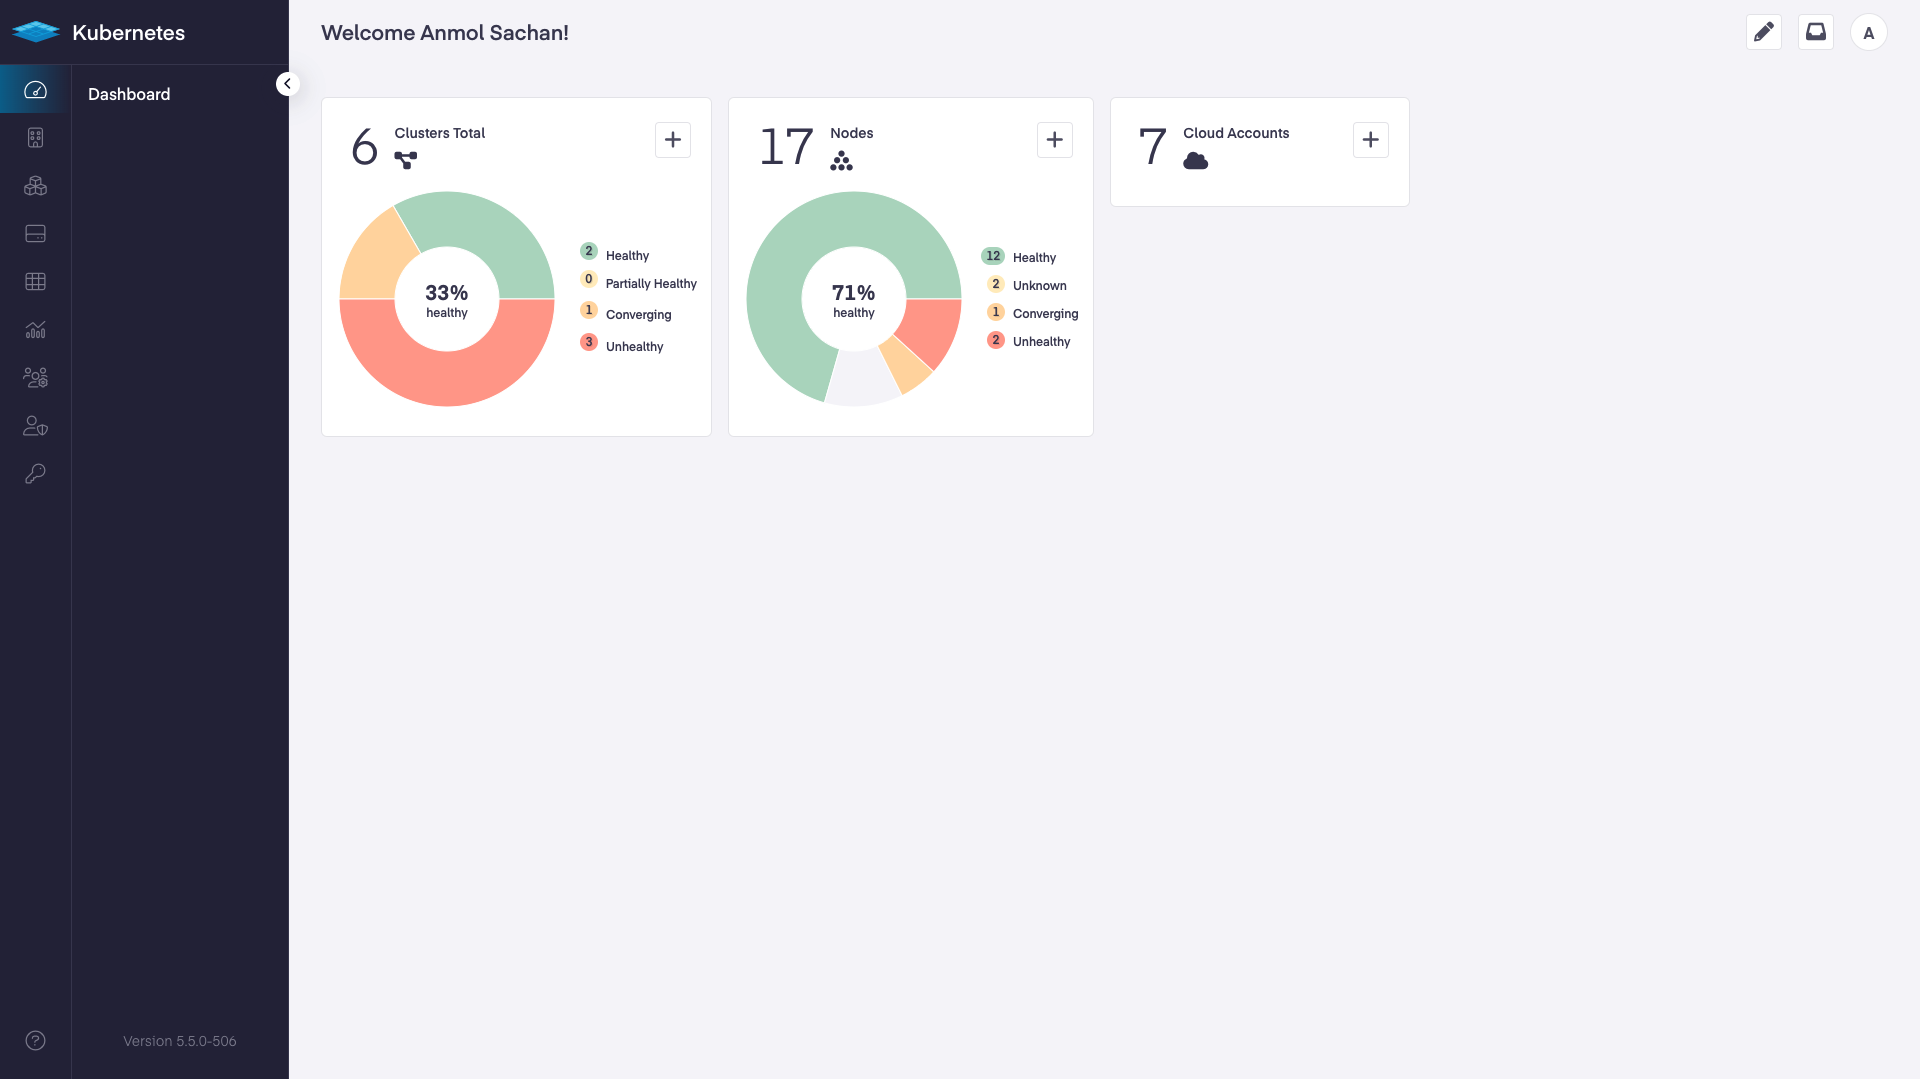
On Premises (BareOS)
What is BareOS
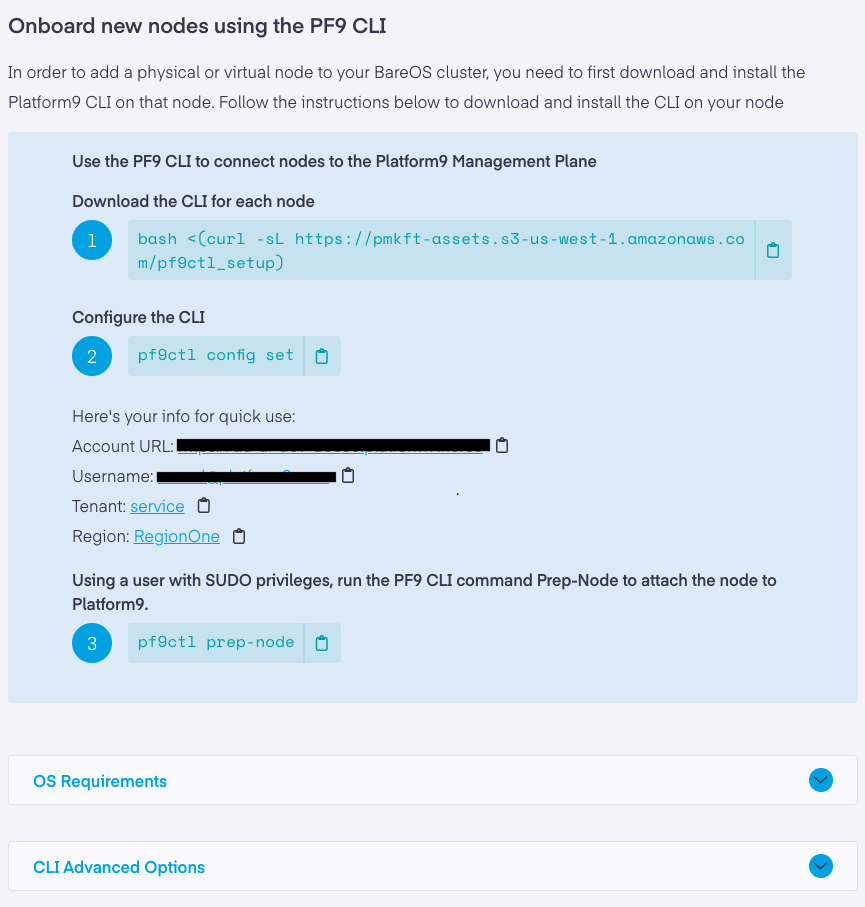
What you’ll need
2
Step: Create a Node
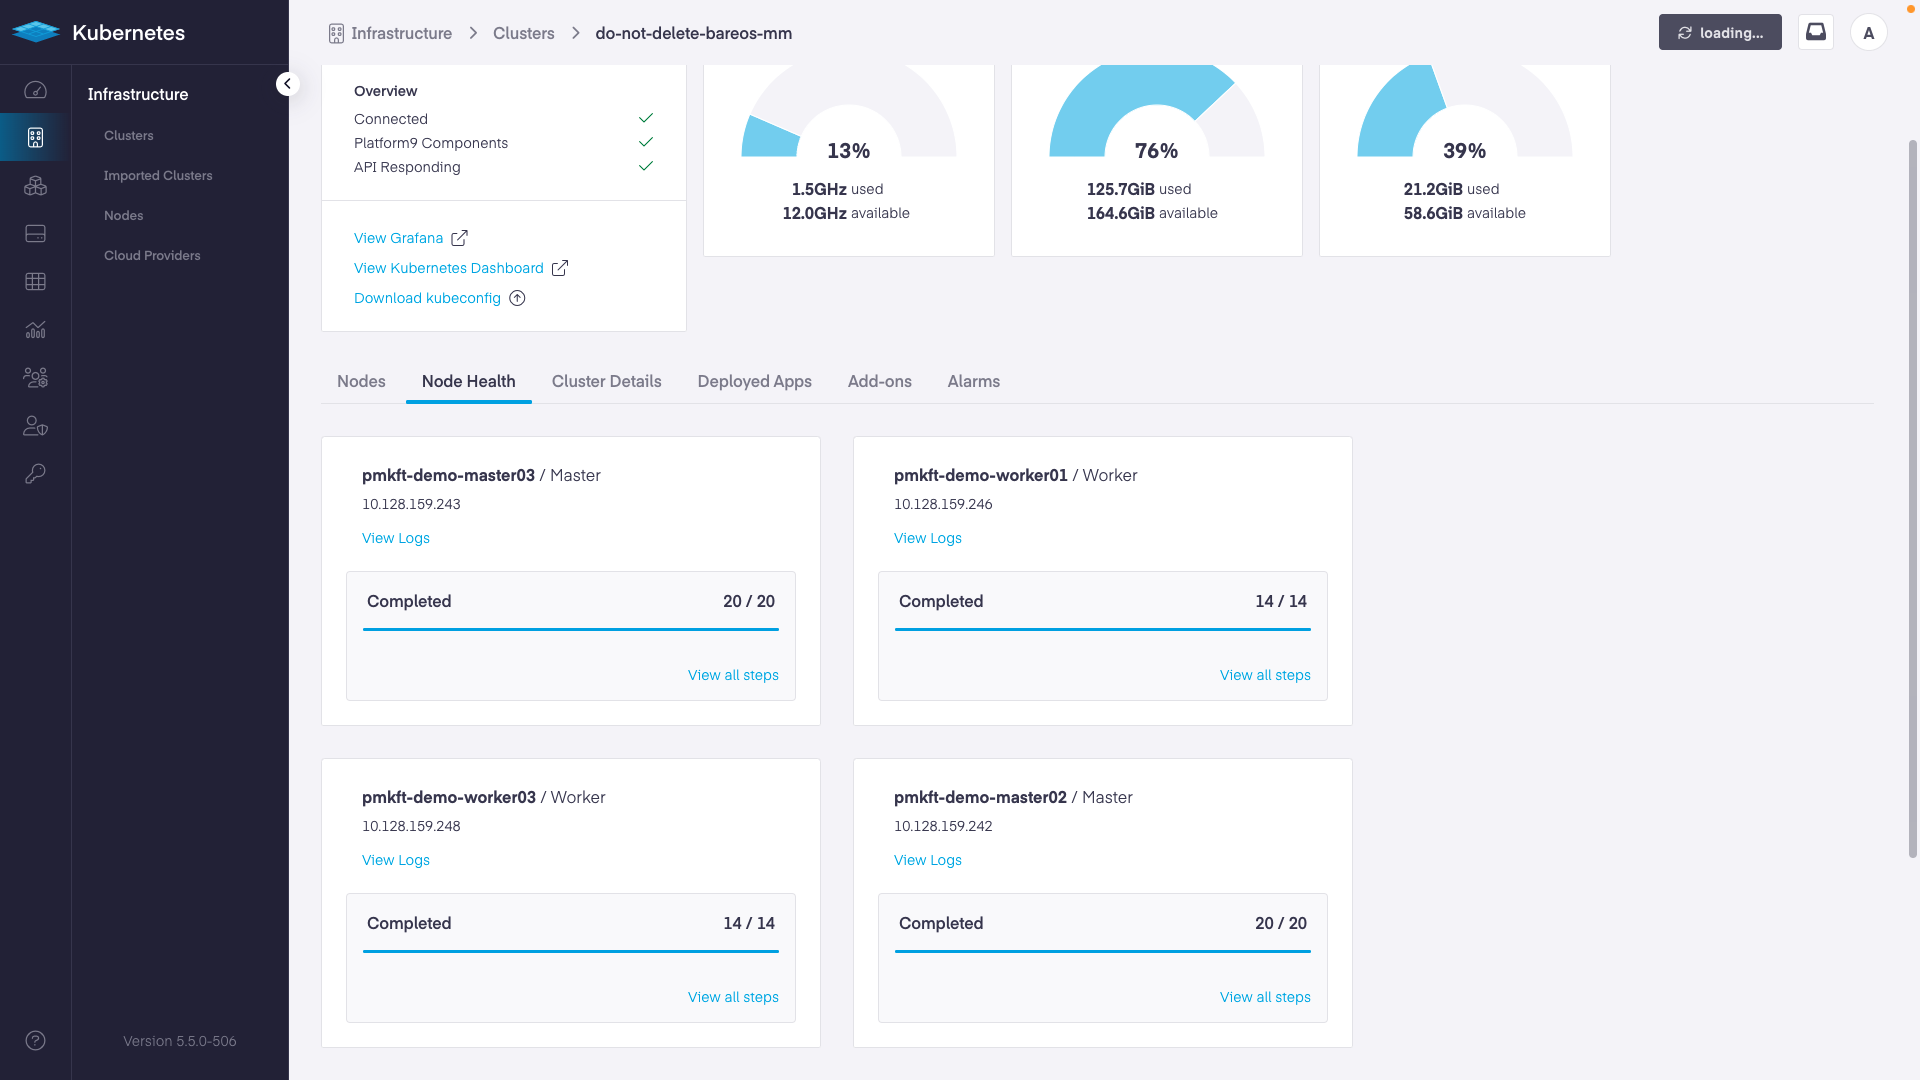
✓ Loaded Config Successfully
✓ Missing package(s) installed successfully
✓ Removal of existing CLI
✓ Existing Platform9 Packages Check
✓ Required OS Packages Check
✓ SudoCheck
✓ CPUCheck
x DiskCheck - At least 30 GB of total disk space and 15 GB of free space is needed on host. Disk Space found: 2 GB
x MemoryCheck - At least 12 GB of memory is needed on host. Total memory found: 4 GB
✓ PortCheck
✓ Existing Kubernetes Cluster Check

✓ Completed Pre-Requisite Checks successfully

Optional pre-requisite check(s) failed. Do you want to continue? (y_n)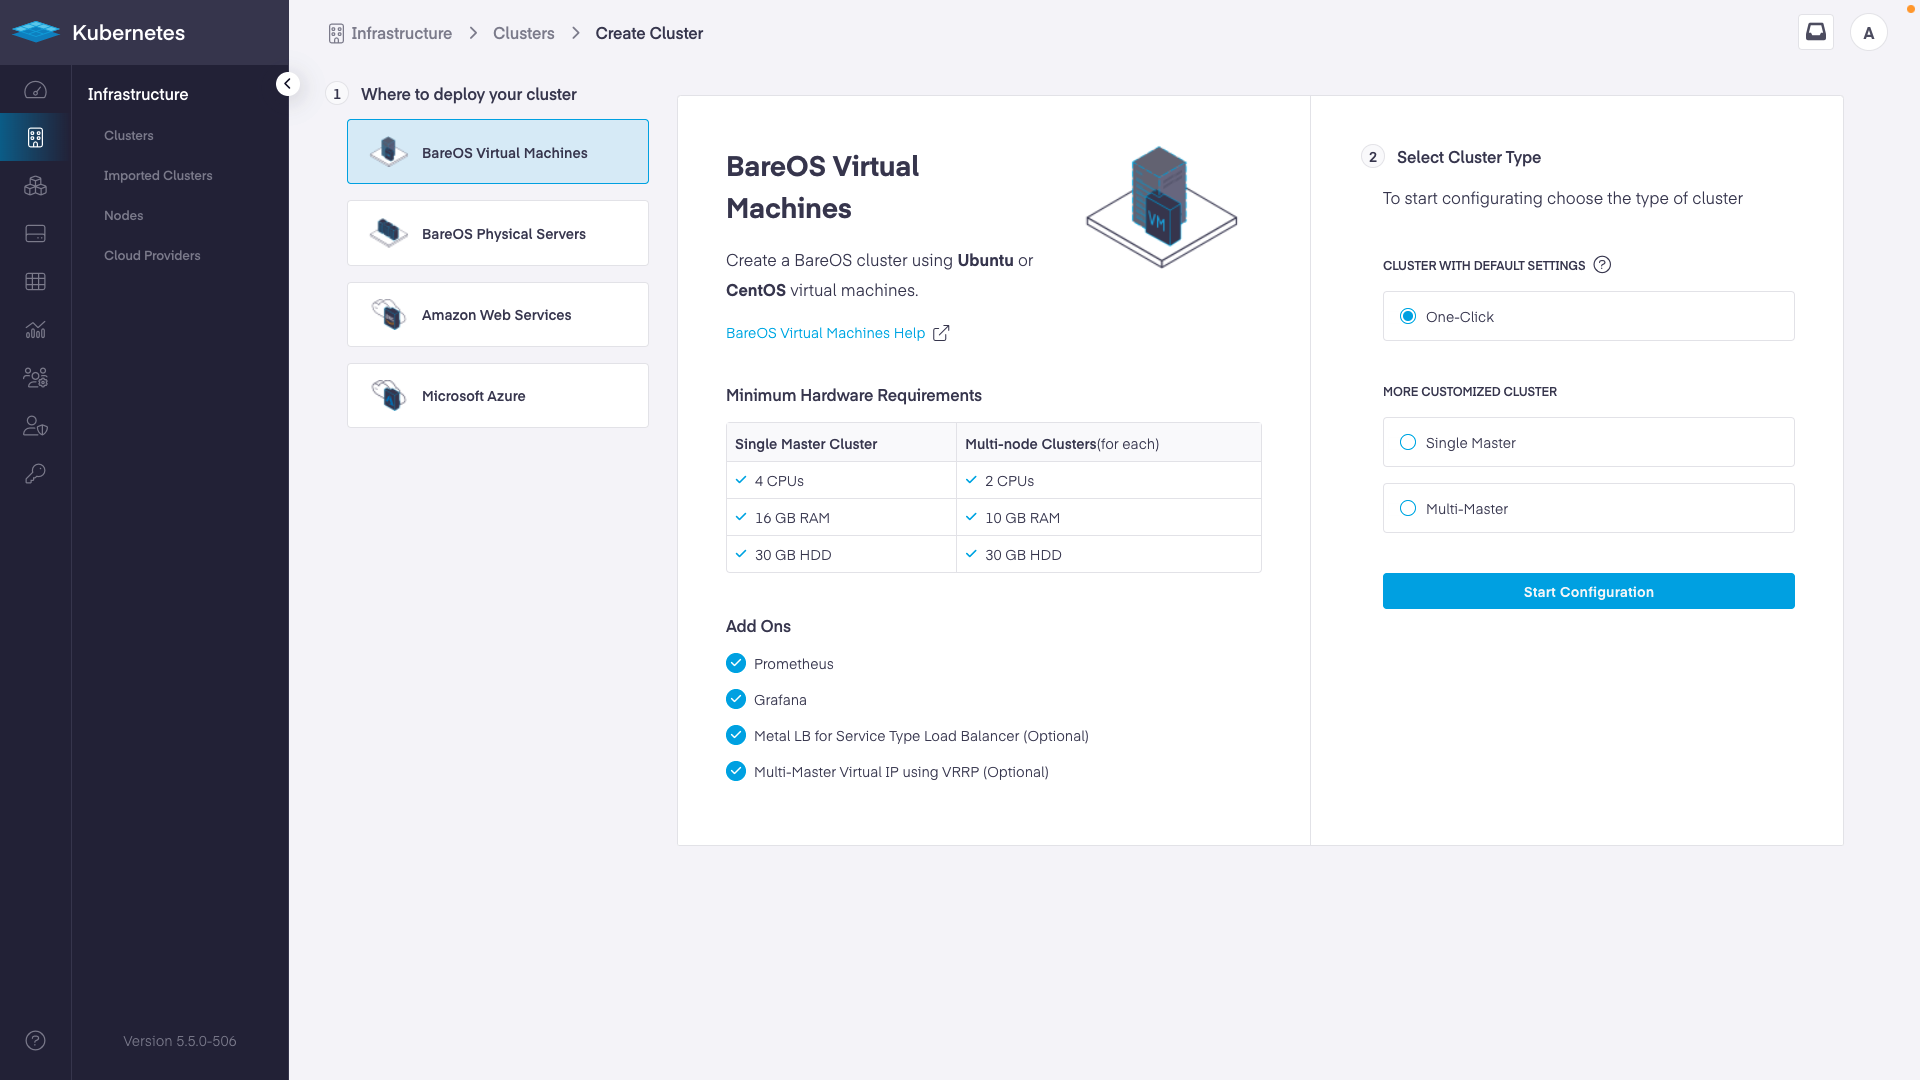
Last updated
Was this helpful?