# Migrate Secondary Linux VM Disk from vSphere to OpenStack

In this article, we will migrate a secondary Linux VM disk from vSphere to an OpenStack Cinder volume.

### Requirements

* A vSphere VM with Linux installed
* A secondary disk on the Linux VM
* A host with the Block Storage role

{% hint style="info" %}
**Note**

This article assumes that if the secondary disk uses LVM, the LVM volumes do not span other disks.
{% endhint %}

### Step 1 - Convert VMDK to QCOW2

<figure><img src="https://2491133324-files.gitbook.io/~/files/v0/b/gitbook-x-prod.appspot.com/o/spaces%2FTp3vmrOuO3dQilOzN2fE%2Fuploads%2Fgit-blob-fd23448a899a198b0420d713024f374aba589575%2F1605295089.png?alt=media" alt=""><figcaption></figcaption></figure>

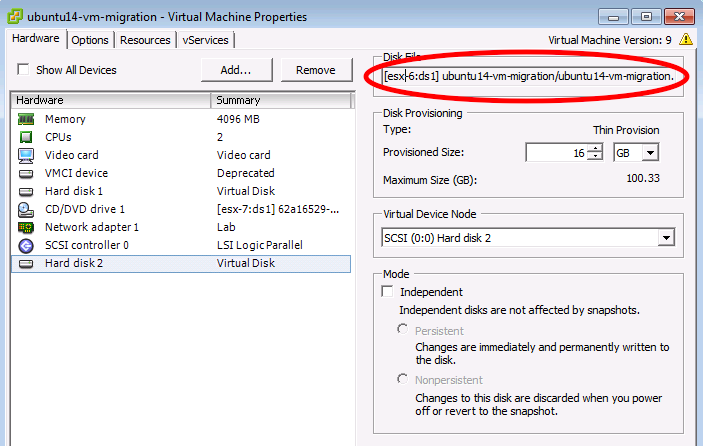
After powering off the VM, note the path of the secondary disk by selecting it in the VM settings. Secondary disks are usually listed after the first disk, unless there is a bios.hddOrder value in the .vmx file for the VM.

Copy the flat VMDK from the ESX host to the Image Library, or a machine with the qemu-img command available.

<figure><img src="https://2491133324-files.gitbook.io/~/files/v0/b/gitbook-x-prod.appspot.com/o/spaces%2FTp3vmrOuO3dQilOzN2fE%2Fuploads%2Fgit-blob-967f955dd84517f3f5263c05a21df0eabee3359c%2F1605295114.png?alt=media" alt=""><figcaption></figcaption></figure>

After copying, convert the VMDK to a QCOW2 image.

{% tabs %}
{% tab title="OpenStack" %}

```none
qemu-img convert -O qcow2 <input vmdk file /> <ouput qcow2 file>
```

{% endtab %}
{% endtabs %}

For example:

{% tabs %}
{% tab title="OpenStack" %}

```none
qemu-img convert -O qcow2 ubuntu14-vm-migration-flat.vmdk ubuntu14-vm-migration-secondary.qcow2
```

{% endtab %}
{% endtabs %}

### Step 2 - Upload the Image to the Image Library Host

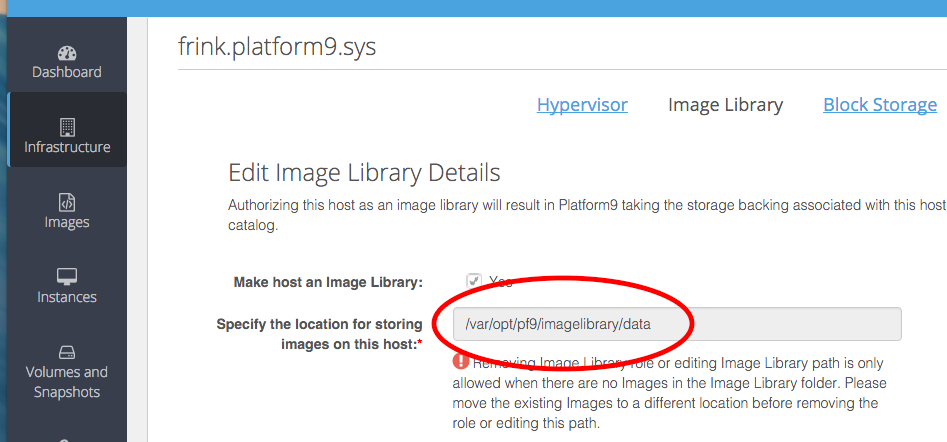
You can simply copy the converted qcow2 image to the Image library host's image directory.

<figure><img src="https://2491133324-files.gitbook.io/~/files/v0/b/gitbook-x-prod.appspot.com/o/spaces%2FTp3vmrOuO3dQilOzN2fE%2Fuploads%2Fgit-blob-55f3c5871a27d885266ec775d33d2eb52eb18e8d%2F1605295177.png?alt=media" alt=""><figcaption></figcaption></figure>

<figure><img src="https://2491133324-files.gitbook.io/~/files/v0/b/gitbook-x-prod.appspot.com/o/spaces%2FTp3vmrOuO3dQilOzN2fE%2Fuploads%2Fgit-blob-8132329397822e00871b846811bf5b7e0a643daf%2F1605295197.png?alt=media" alt=""><figcaption></figcaption></figure>

**OR**

Follow our support guide on [Managing Images with CLI](https://docs.platform9.com/managed-openstack/5.8/images/images-mange-images-cli) if you are not familiar with the OpenStack Glance Client. Then, use the glance command to upload the image.

For example:

{% tabs %}
{% tab title="Glance" %}

```none
glance image-create --disk-format qcow2 \
--container-format bare \
--file ubuntu14-vm-migration-secondary.qcow2 \
--visibility public \
--name ubuntu14-vm-migration-secondary \
--property pf9_description="Linux VM secondary disk migrated from vSphere" \
--property pf9_virtual_size=26422542336
```

{% endtab %}
{% endtabs %}

### Step 3 - Create a Cinder Volume

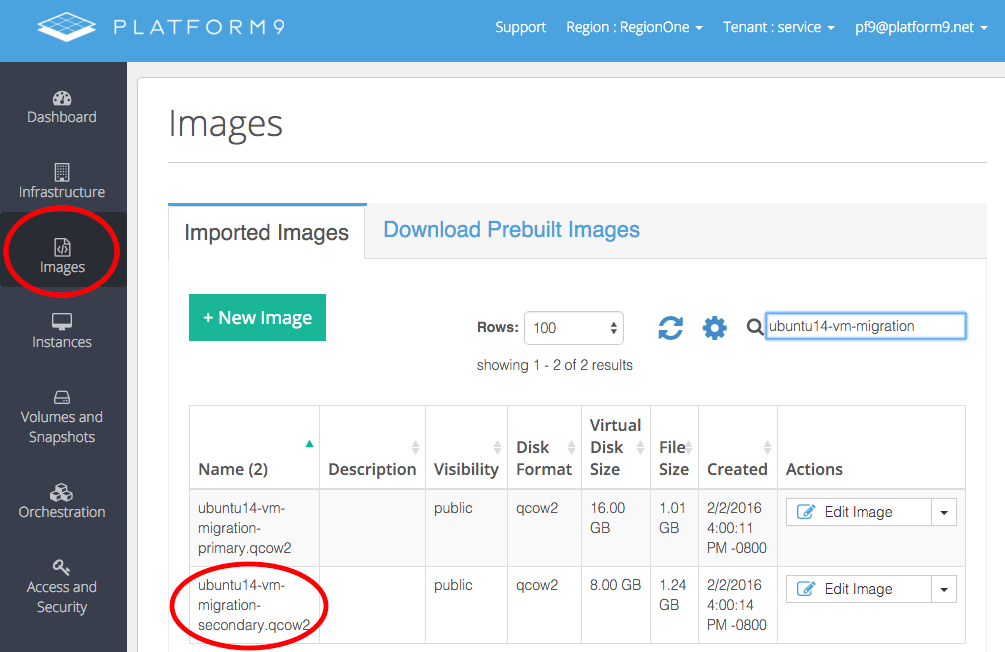
The secondary disk image should now be present in the UI.

<figure><img src="https://2491133324-files.gitbook.io/~/files/v0/b/gitbook-x-prod.appspot.com/o/spaces%2FTp3vmrOuO3dQilOzN2fE%2Fuploads%2Fgit-blob-a35ae30e57790ae2430d524793729b3cfad73893%2F1605295268.png?alt=media" alt=""><figcaption></figcaption></figure>

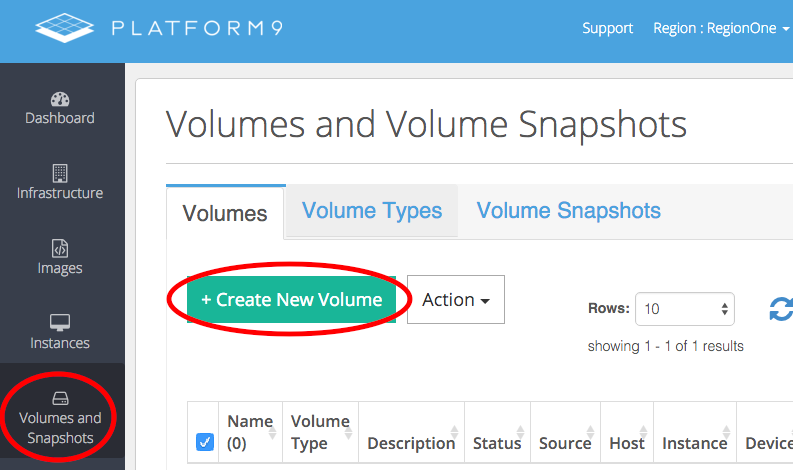
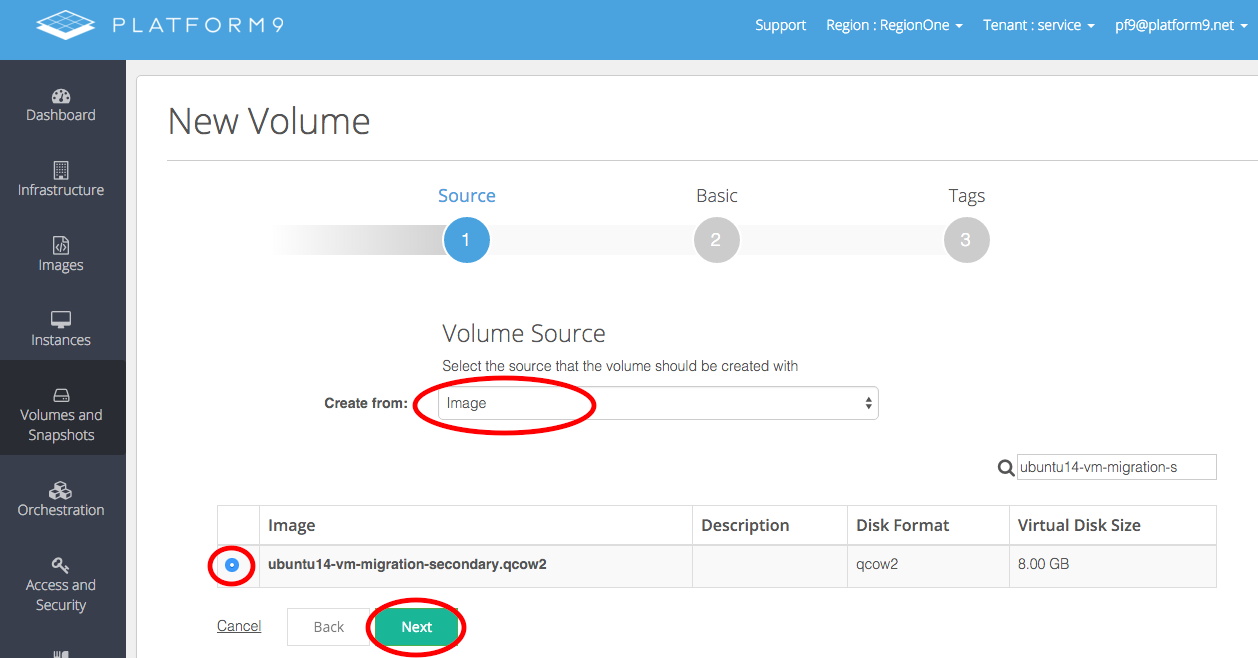
Create a volume from this image by clicking "Create New Volume" from the Volume and Snapshots view.

<figure><img src="https://2491133324-files.gitbook.io/~/files/v0/b/gitbook-x-prod.appspot.com/o/spaces%2FTp3vmrOuO3dQilOzN2fE%2Fuploads%2Fgit-blob-7b11929ca6b270f943e3328f1d203131c6ddec13%2F1605295294.png?alt=media" alt=""><figcaption></figcaption></figure>

Select "Image" in the dropdown menu. Then, select the image for the secondary VM disk.

<figure><img src="https://2491133324-files.gitbook.io/~/files/v0/b/gitbook-x-prod.appspot.com/o/spaces%2FTp3vmrOuO3dQilOzN2fE%2Fuploads%2Fgit-blob-d4db8cdcbd058e3eaf65b0282ba6ef4e35d37b2a%2F1605295318.png?alt=media" alt=""><figcaption></figcaption></figure>

Click next, and complete the form to the finish creating the volume.

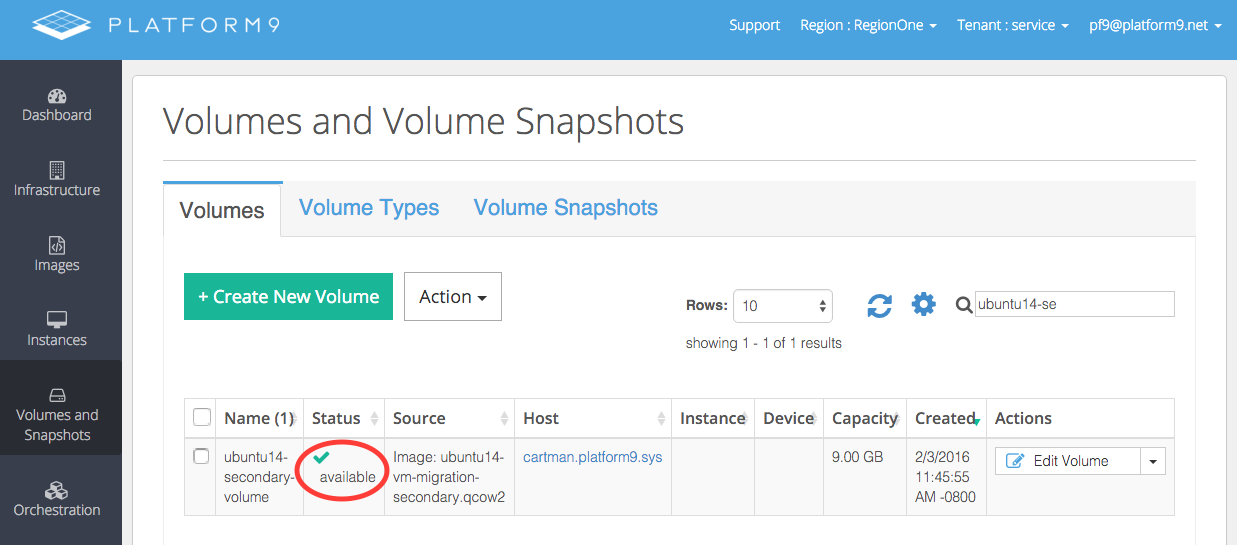
The volume should soon be in the available state.

<figure><img src="https://2491133324-files.gitbook.io/~/files/v0/b/gitbook-x-prod.appspot.com/o/spaces%2FTp3vmrOuO3dQilOzN2fE%2Fuploads%2Fgit-blob-8186a36e4159638b92efc043314a0295168a6898%2F1605295352.png?alt=media" alt=""><figcaption></figcaption></figure>

### Step 4 - Attach the migrated volume

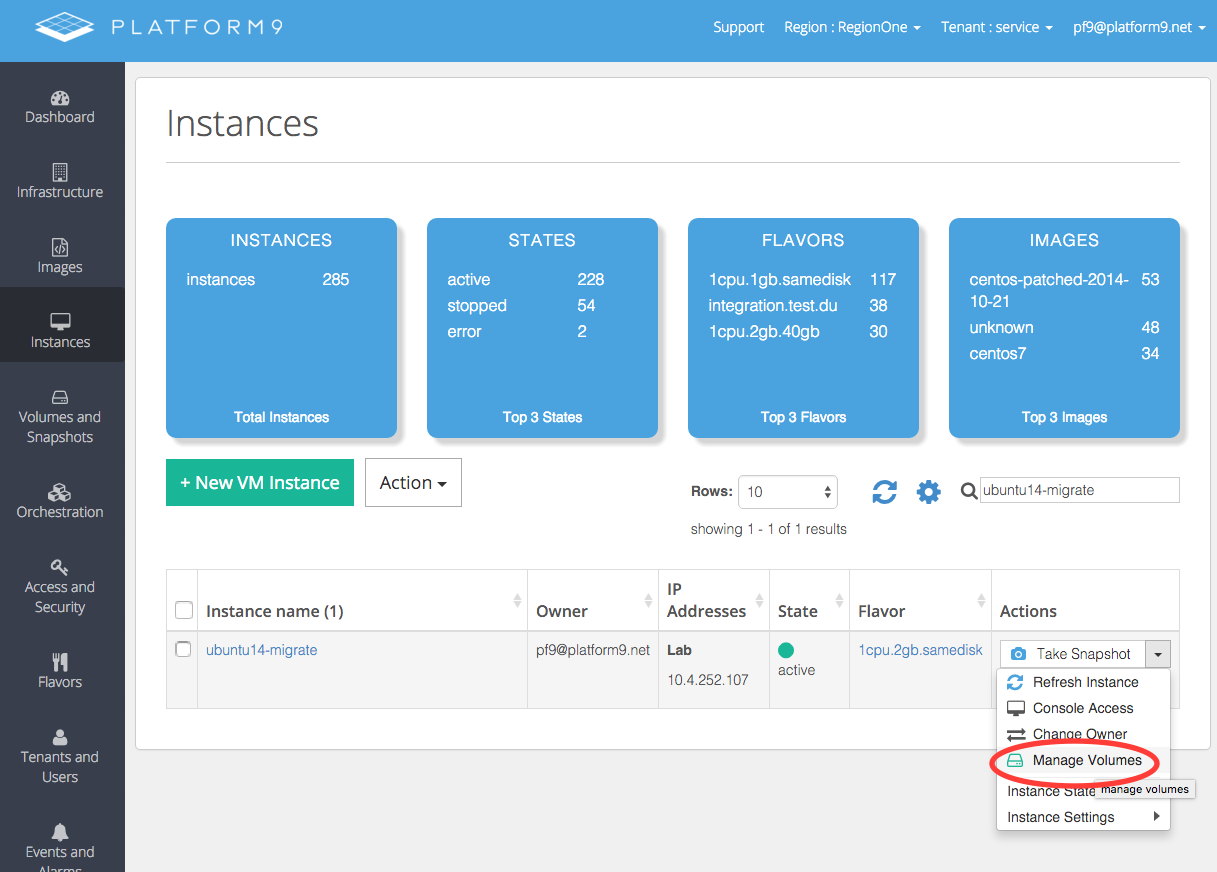
From the Instances view, select the "Manage Volumes" action to attach the volume to a VM.

<figure><img src="https://2491133324-files.gitbook.io/~/files/v0/b/gitbook-x-prod.appspot.com/o/spaces%2FTp3vmrOuO3dQilOzN2fE%2Fuploads%2Fgit-blob-32d44649c6ba3e9b72a975a7d7ef2a03c5e34294%2F1605295386.png?alt=media" alt=""><figcaption></figcaption></figure>

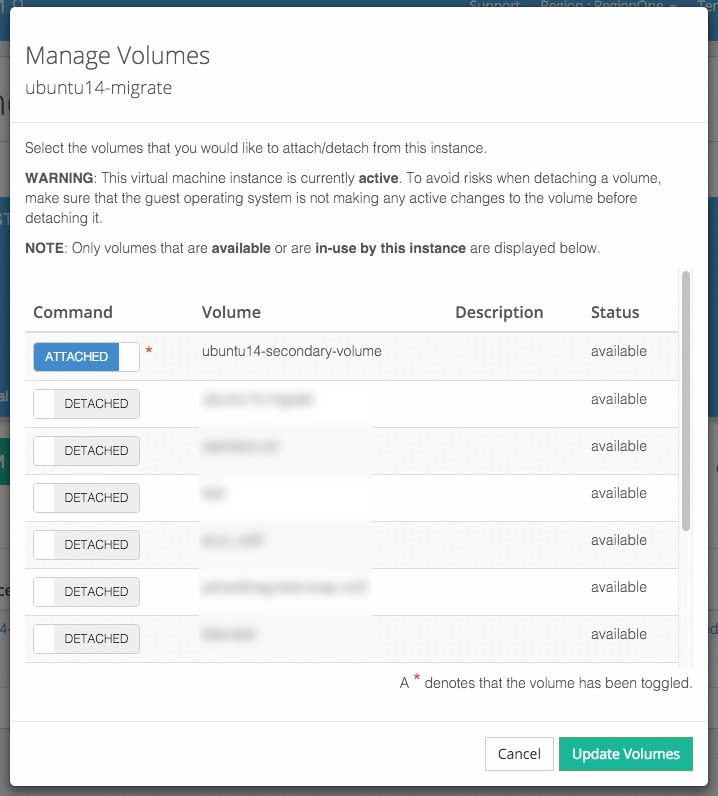
Ensure the volume is attached and click "Update Volumes".

<figure><img src="https://2491133324-files.gitbook.io/~/files/v0/b/gitbook-x-prod.appspot.com/o/spaces%2FTp3vmrOuO3dQilOzN2fE%2Fuploads%2Fgit-blob-3a7764006e41180062563962974d1a7408d03010%2F1605295414.jpg?alt=media" alt=""><figcaption></figcaption></figure>

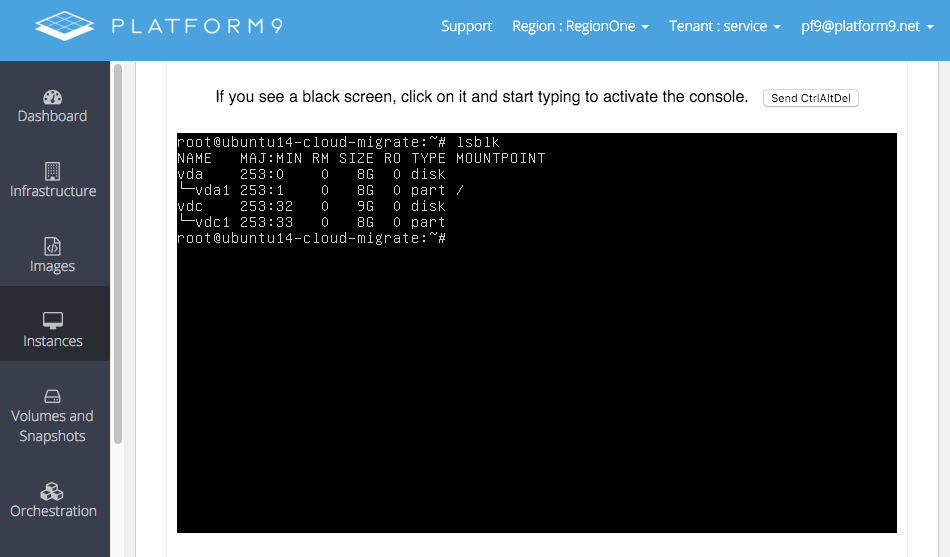
### Step 5 - Verify the attached volume

When accessing the VM through the console or SSH, run the `lsblk` command to verify that the volume was attached.

<figure><img src="https://2491133324-files.gitbook.io/~/files/v0/b/gitbook-x-prod.appspot.com/o/spaces%2FTp3vmrOuO3dQilOzN2fE%2Fuploads%2Fgit-blob-5779c58b9ba27ca5072b6827e1ed08704362eee9%2F1605295443.png?alt=media" alt=""><figcaption></figcaption></figure>

Enjoy your newly migrated volume!
