# Single Sign-on with Google G Suite
Platform9 supports single sign-on (SSO) with Google G Suite (G Suite).
To configure G Suite integration, you must have a G Suite Apps administrator account.
As a G Suite administrator, you can enable SSO through G Suite for other users in the organization. This enables the users to sign in to Platform9 Managed OpenStack, by using their G Suite credentials.
## Enable SSO Through G Suite for Platorm9
Follow the steps given below to integrate Google with Platform9 for SSO.
### Step 1 - Login to G Suite
Login to G Suite as the Apps administrator and follow the first few steps given in [Google: Set up your own custom SAML application](https://support.google.com/a/answer/6087519) to set up your SAML custom app.
### Step 2 - Create custom SAML app
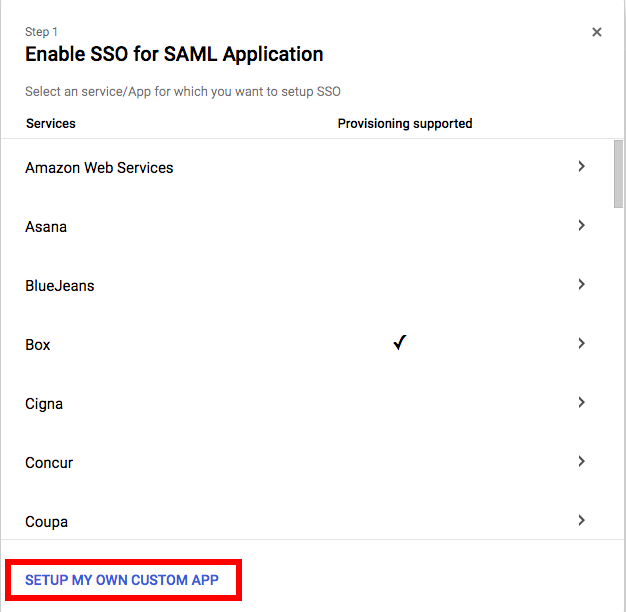
From the "SAML Apps" page under the admin section, click the yellow plus sign in the bottom right-hand corner to begin adding a new SAML application, then click **Setup my own custom SAML App**.
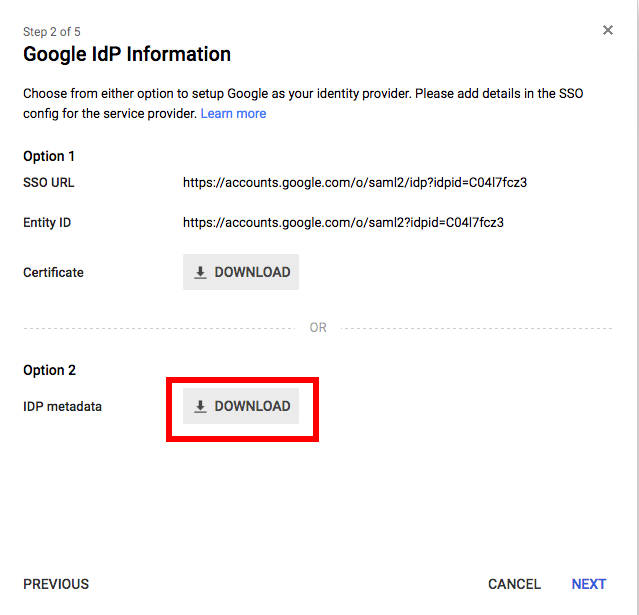
Download the IdP metadata XML file and email this to .
Then, click **Next**.
### Step 3 - Configure basic app information
Specify the name and description of the custom app, and optionally upload a logo for the custom app.
Click **Next**.
### Step 4 - Specify Platform9 (service provider) details
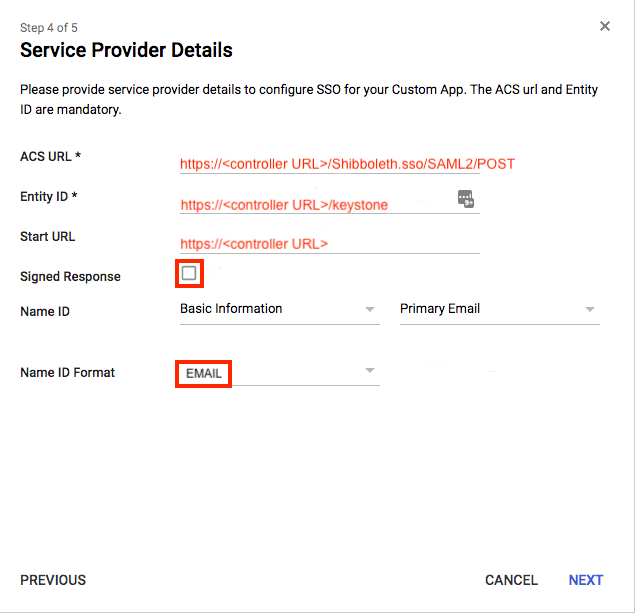
Specify the ACS, Entity ID, and Start URLs as follows.
* **ACS URL**: https\:///Shibboleth.sso/SAML2/POST
* **Entity ID**: https\:///keystone
* **Start URL**: https\://
* Select the **Signed Response** check box.
* Set the Name ID Format to "EMAIL".
### Step 5 - Configure exported SAML attributes
Configure the Platform9-required the FirstName, LastName, and Email attribute mappings. Click **Add New Mapping** to add an attribute mapping.
Click **Finish** to complete the SAML application setup.
### Step 6 - Create SSO Group Mappings in Platform9
After receiving a confirmation email that the Platform9 Support team has received your IdP metadata & enabled SSO on your environment, login to Platform9 Clarity UI as an administrator. Now, follow the steps 2 through 5 given in the [Integrating Single Sign-On (SSO) Support with Platform9 Managed OpenStack](https://docs.platform9.com/managed-openstack/5.8/authentication-and-authorization/single-sign-on-sso) article. Once this is done, integration of G Suite with Platform9 for SSO is complete.