> For the complete documentation index, see [llms.txt](https://docs.platform9.com/llms.txt). Markdown versions of documentation pages are available by appending `.md` to page URLs; this page is available as [Markdown](https://docs.platform9.com/managed-openstack/5.6/tutorials/tutorials-migrate-windows-vm-vmware-kvm.md).
# Migrate Windows VM from vSphere to KVM
In this guide, we will migrate a Windows VM from vSphere to KVM.
### Requirements
* A vSphere VM with one of the following operating systems (All 64 bit):
* Windows Server 2003
* Windows Server 2008
* Windows Server 2008 R2
* Windows Server 2012
* Windows Server 2012 R2
* Windows 7
* Windows 8
* Windows 8.1
* Windows XP
* Administrator privileges for the VM.
* The VM must only have one disk.
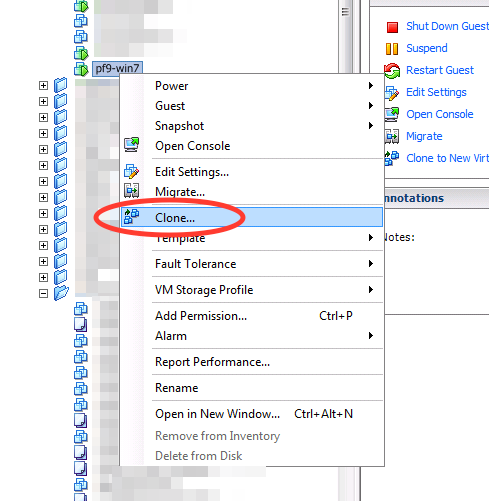
### Step 1 - Clone the VM to be Migrated
Since we will modify the VM before converting formats, first clone the VM to keep the original VM intact.
### Step 2 - Install Virtio Drivers
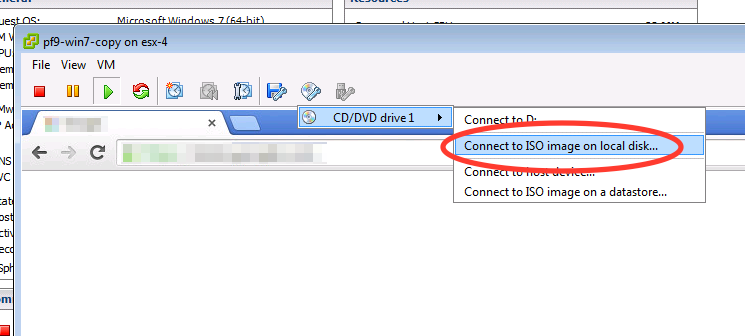
After cloning, power on the new VM. Download the [Virtio drivers](https://fedorapeople.org/groups/virt/virtio-win/direct-downloads/stable-virtio/virtio-win.iso) onto the machine running the vSphere client. Attach the ISO to the VM.
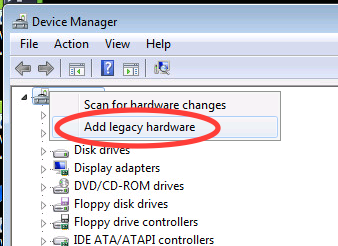
Open the Device Manager on the Windows VM. Then, right click on the root device and select "Add legacy hardware".
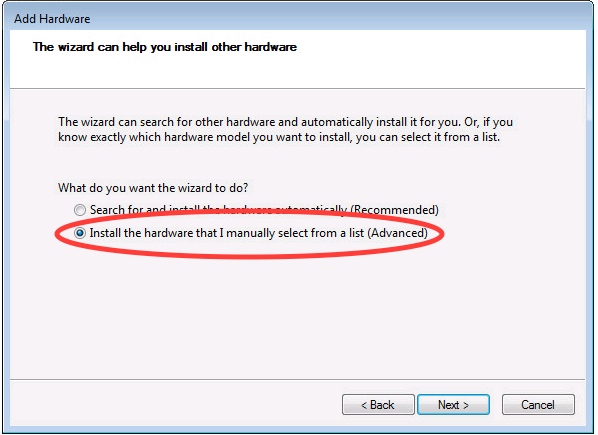
Click Next. Then select "Install the hardware that I manually select..." and click Next.
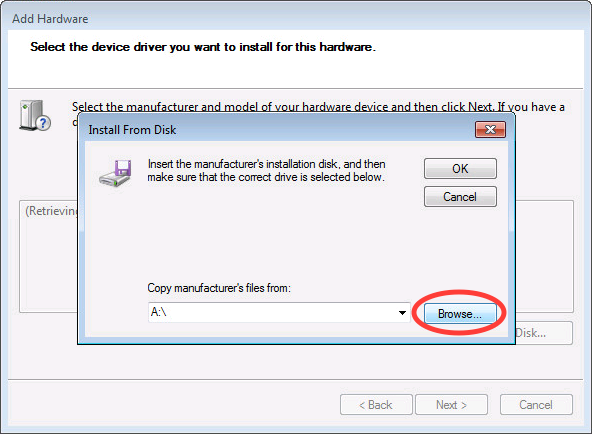
Click Next again. Then, click "Have Disk...". Click "Browse...".
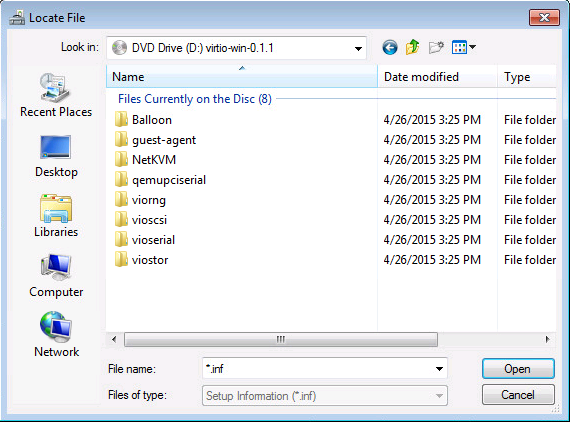
Then, navigate to the directory of the ISO.
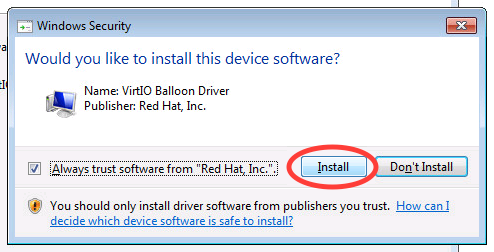
Click on "Balloon". Then, select your operating system version. Select the architecture (x86 or amd64). Then, select the INF file (There should only be one of these). Click OK, then Next, and Next again. You may need to confirm the driver installation.
When installing the driver, you may receive an error saying that the device cannot start or is not working properly. This is normal, and the driver should be able to start when the VM boots on a KVM hypervisor.
**Repeat the process above for the directories NetKVM, qemupciserial, viorng, vioscsi, vioserial, and viostor.**
Ignore errors if the qemupciserial driver complains about the machine architecture.
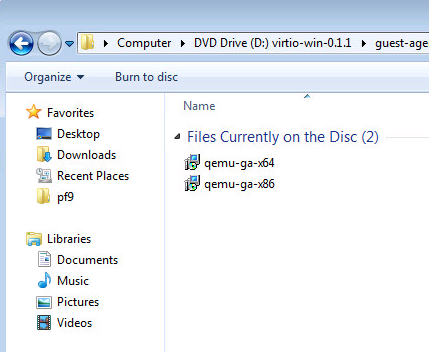
Finally, install the QEMU guest agent on the VM. The installer is located in the ISO file. Only use the installer that matches your architecture (x86 or x64).
### Step 3 - Add the Virtio Drivers to the Windows Registry
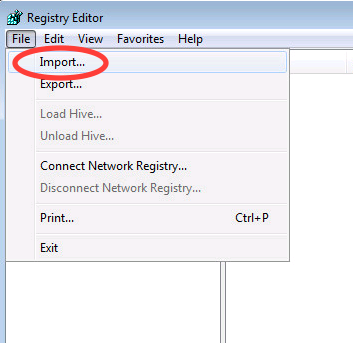
Download the [Virtio Registry File](http://migration.platform9.com.s3-us-west-1.amazonaws.com/virtio.reg) onto the VM. Then, open the Windows Registry Editor by searching regedit from the start menu. Click **File -> Import..**.
Then select the [Virtio Registry File](http://migration.platform9.com.s3-us-west-1.amazonaws.com/virtio.reg) that was downloaded.
### Step 4 - Uninstall VMware Tools
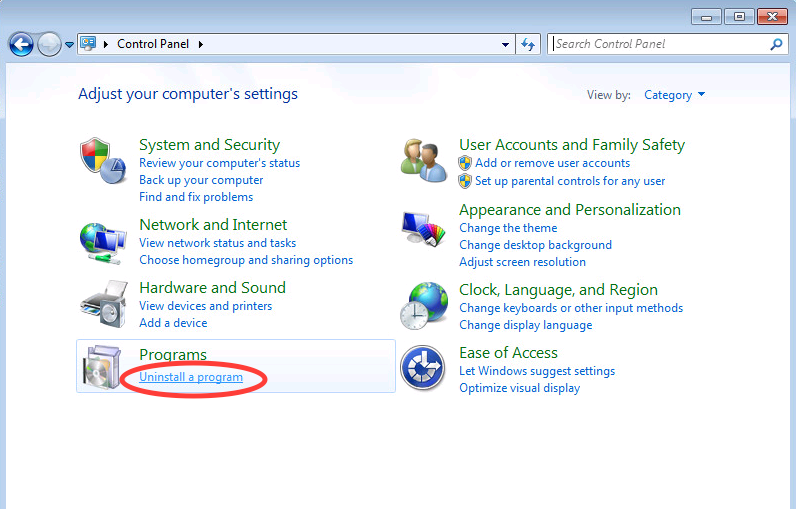
From the control panel, click on "Uninstall a program".
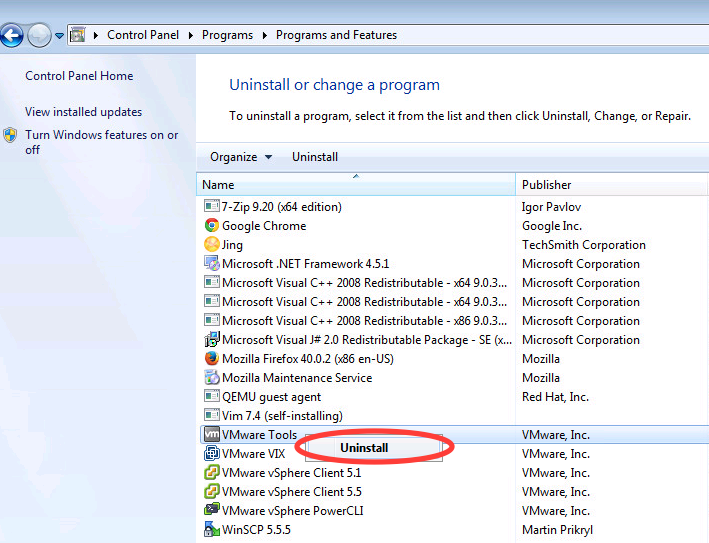
Find the VMware Tools program. Right click on it and select Uninstall. Then, confirm the uninstall.
If prompted to reboot the machine, select Yes.
### Step 5 - Install Cloudbase
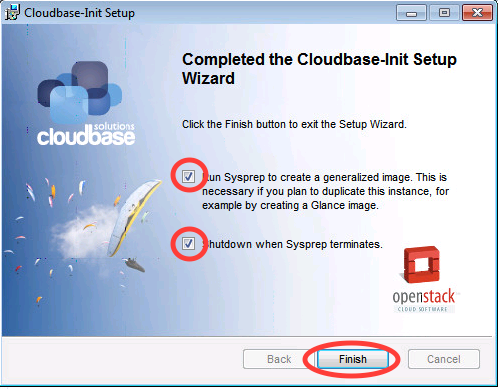
Download the stable [Cloudbase software](http://www.cloudbase.it/cloud-init-windows/). Open the installer and click Next until the final the step is reached. Select both the sysprep and the shutdown options. Then, click Finish.
### Step 6 - Convert VMDK to QCOW2
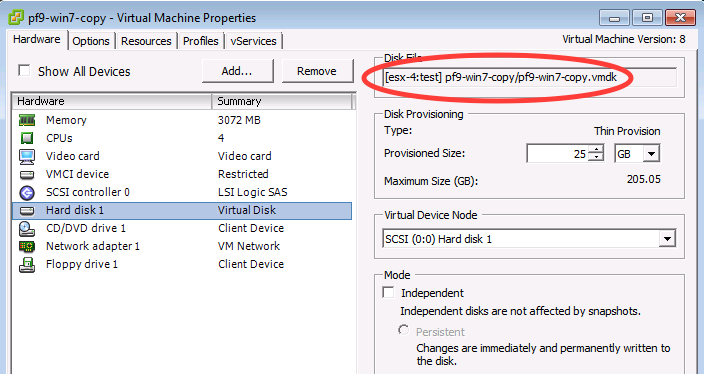
Note the path of the hard disk of the VM by editing the settings of the VM and selecting the Virtual Disk.
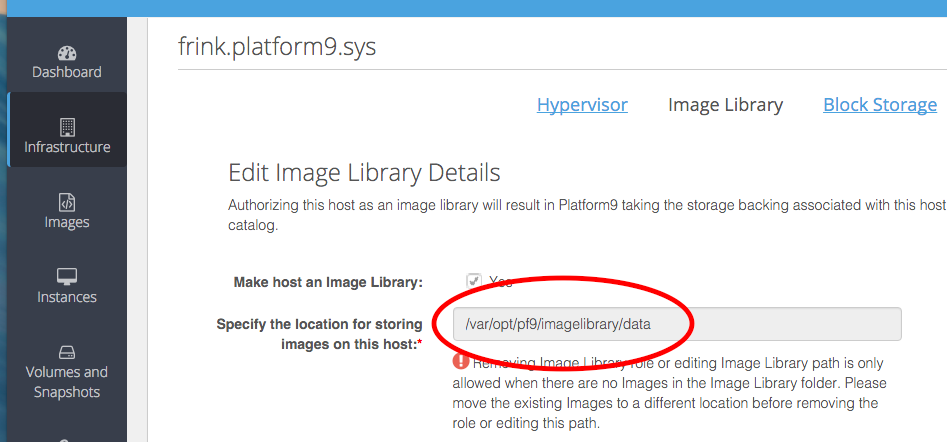
Copy the flat VMDK from the ESX host to the Image Library, or a machine with the qemu-img command available.
After copying, convert the VMDK to a QCOW2 image.
{% tabs %}
{% tab title="None" %}
```none
qemu-img convert -O qcow2
```
{% endtab %}
{% endtabs %}
For example:
{% tabs %}
{% tab title="None" %}
```none
qemu-img convert -O qcow2 pf9-win7-copy-flat.vmdk pf9-win7.qcow2
```
{% endtab %}
{% endtabs %}
### Step 7 - Upload the Image to the Image Library Host
You can simply copy the converted qcow2 image to the Image library host's image directory.
**OR**
Follow our support guide on [Installing OpenStack CLI Clients](/managed-openstack/5.6/cli-access/cli-access-cli-overview.md) if the openstack client is not yet installed. Then, use the openstack command to upload the image.
{% tabs %}
{% tab title="OpenStack" %}
```none
openstack image create --disk-format qcow2
--container-format bare
--file pf9-win7.qcow2
--visibility public
--name pf9-win7
--property pf9_description="Windows VM migrated from vSphere"
--property pf9_virtual_size=
```
{% endtab %}
{% endtabs %}
For example:
{% tabs %}
{% tab title="OpenStack" %}
```none
openstack image create --disk-format qcow2
--container-format bare
--file
--visibility public
--name
--property pf9_description="Windows VM migrated from vSphere"
--property pf9_virtual_size=26422542336
```
{% endtab %}
{% endtabs %}
### Step 8 - Create an Instance
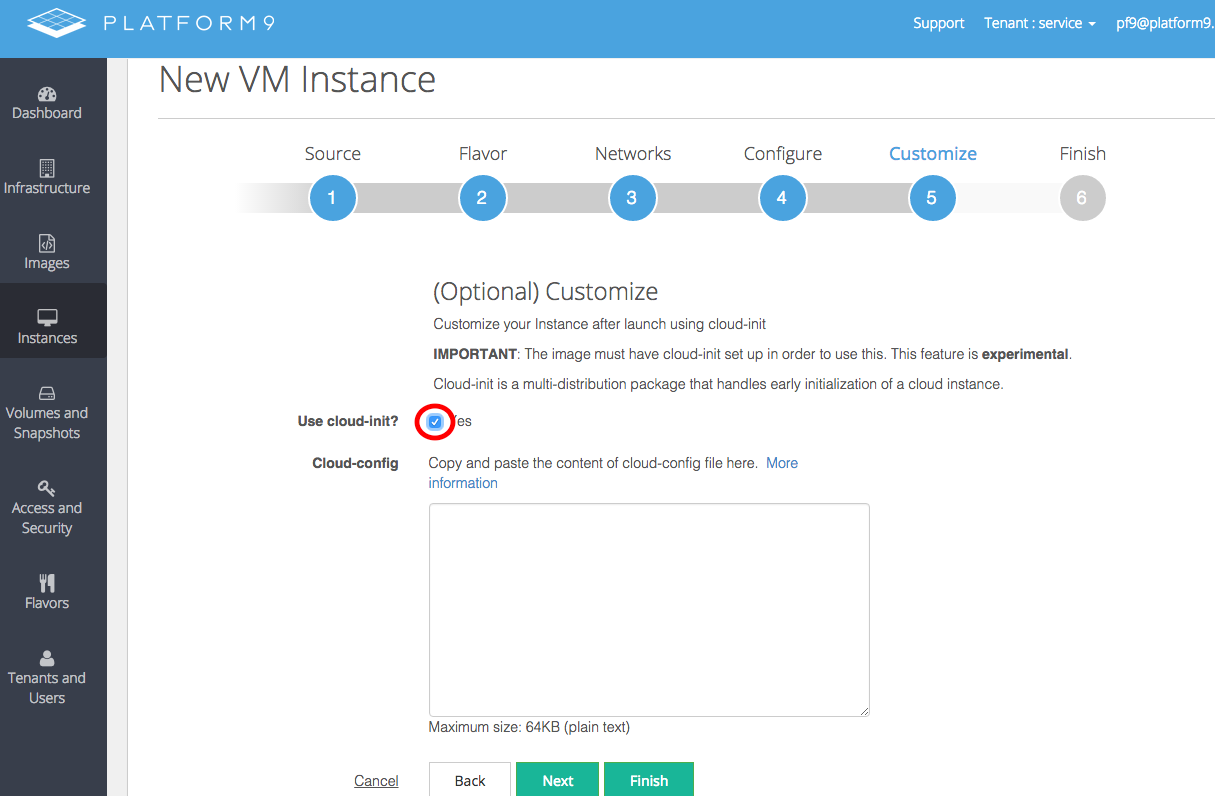
Create an instance as you normally would. However, for Windows VMs using cloudbase-init, ensure cloud-init is enabled.
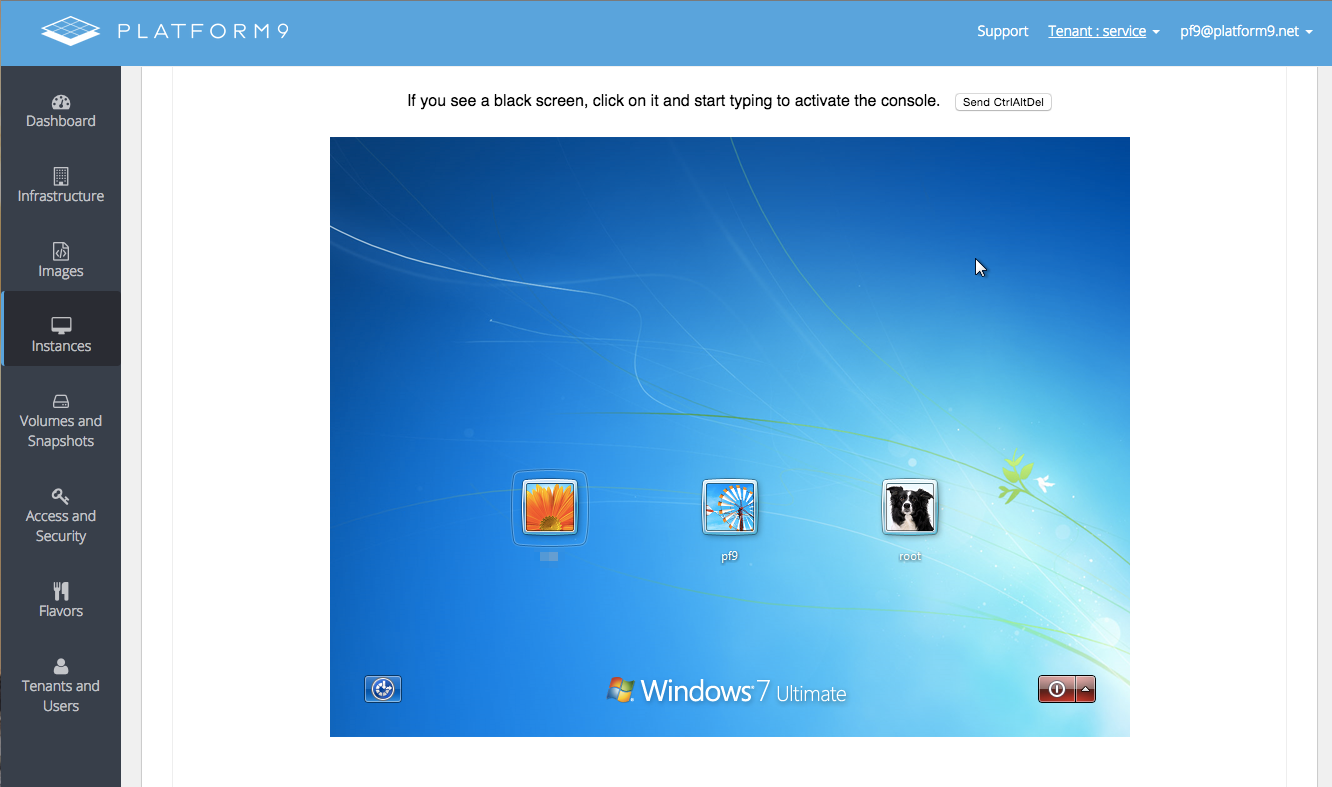
Enjoy your newly migrated Windows VM!
---
# Agent Instructions
This documentation is published with GitBook. GitBook is the documentation platform designed so that both humans and AI agents can read, navigate, and reason over technical content effectively. Learn more at gitbook.com.
## Querying This Documentation
If you need additional information that is not directly available in this page, you can query the documentation by asking a question.
Perform an HTTP GET request on the following URL with the `ask` and `goal` query parameters:
```
GET https://docs.platform9.com/managed-openstack/5.6/tutorials/tutorials-migrate-windows-vm-vmware-kvm.md?ask=&goal=
```
`ask` is the immediate question: it should be specific, self-contained, and written in natural language.
`goal` is what the user is ultimately trying to achieve, the reason they need the answer. Sharing it helps GitBook give you a better, more relevant answer. A goal is most helpful when it describes the outcome the user wants rather than restating the question. For example, with `ask=how do I create an API token`, a goal like `automate deployments from our CI pipeline` lets GitBook tailor the answer to that use case.
The response will contain a direct answer to the question and relevant excerpts and sources from the documentation.
Use this mechanism when the answer is not explicitly present in the current page, you need clarification or additional context, or you want to retrieve related documentation sections.